Thursday, February 4, 2010

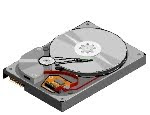
How to remove/repair Bad Sectors from your hard disk!!


Yeah its true now you can remove bad sectors from your hard disk and get your lost data and partially dead hard disks back to life..

Well the procedure is very simple and easy to use.

Firstly you should have a CD writer in your system. and you also need a recordable empty CD.


Now you need to download the image file of a software which is named as Spinrite.

The image file will be in .iso format and you can write it on the CD by using any CD recording tool like Nero, Power ISO etc…

When you are done writing the CD restart you pc and boot your system from cd because this is such a software which works in DOS mode so that the hard disk is not being used by any other program or windows..

The software will then examine your hard drive and ask you for the partitions you want to check.. choose the partition you think which have bad sectors and the data in them is unreadable or they work really slow..

Then select the type of repairing you want to do to your hard drive among the five options choose the last one to get the best results..

This software will take its time which could vary from several hours to days depending upon the size and health of the disk but i can assure you that this software will do your work…and repair the partially damaged part of the hard disk..

It will also check all the sectors of that partition for read write errors and fix them and discover the hidden bad sectors and give you hard drive a new life..

Hurray now your lost data is back but make sure to transfer it to some where else before the hard drive dies completely

Thanks for Reading and Dont forget to post your comments after trying the method and I am pretty sure you will not be disappointed..
Read More..

How to Optimize Windows XP Disk Performance.


You may know of a computer where you need to optimize Windows XP disk performance. Do you often have probloems with your hardisk in windows XP? perhaps it is too slow or is chugging along too slowly?.

Some of the important ways to optimize Windows XP disk perfomance are to convert to NTFS, defragment and stop hibernation, we'll look at some of these approaches now.


1. Convert to NTFS.

One option in Windows XP is to switch your hard disk to NTFS format instead of FAT or FAT32 format. In general, i run my hard disk in NTFS format because they are faster and are managed better by Windows XP (although there is some overhead in managing them).

s. Defragment.

Another regular and important task you need to do to optimize windows XP disk performance is defragmentation. make sure you defragment the drive at least once a week to clean up clutter.

3. Check for Disk Errors.

Checking for disk errors is also another useful tool provided by windows XP. This tool is available in the Tools tab of the hard disk propeties sheet. Do explore it and make sure your disk is free of errors.

4. Stop Hibernation.

One tip I usually shar with others to optimize Windows XP disk performance is to switch off hard disk Hibernation mode in Windows XP if you don't need it. If you're not using this mode, then click start > control panel > power Option Properties click the Hibernate tab and clear the enable Hibernation check box.

5. Enable DMA for IDE Drives.

If you have and IDE drive, you will want to enable Direct Memory Access (DMA) mode. This is important for smooth performance when viewing movies and listening to music. Set it up by :
- Going to My Computer > Properties.
- click the Hardware tab and select Device Manager.
- Expand the IDE controllers and double click the IDE primary drive.
- Click the Advance tab and ensure DMA mode is selected from the drop down box.
Incidentally, there are a variety of goog utilities for optimizing hard disk performance. One of the tools i like to use is Norton SystemWorks, it provides end to end disk management and system optimization features.
Read More..

How to Make Your Internet Faster.


Generally, computer users welcome the introduction of broadband Internet connection which does not only provide greater bandwidth compared to the older dial-up Internet connection technology but is also more stable with less instances of disconnection with the Internet Service Provider (ISP). However, what majority of computer users are not aware of is that they do not actually utilize the entire connection bandwidth they are paying for primarily because either the Operating System or the Web browser is limiting the connection speed that is being consumed. In many instances, computer users fail to utilize every bit that they pay for because the programs are still configured for hosting the older dial-up model which transmits data packets significantly slower. This guide assumes that the computer user is subscribed to a broadband connection and is using a machine with adequate configuration which will not cause any slowdown in accessing the Internet.


Materials Needed:
- Computer
- Web browser
- broadband Internet connection
- tweak tools
- Internet booster utilities
Step 1
Before boosting the speed of your Internet connection, it is first important to know where it stands at the moment. This can be done by going to different websites that provide free speed test utilities. Remember that the speed of the Internet connection will always vary each time it is tested. What is important is that the difference should not be significant and must be very close to the subscribed speed.
Step 2
Once the current speed is determined, you can proceed to optimize your Internet connection. Begin by clicking on the “Start” button and selecting the “Control Panel” option.
Step 3
Under the Control Panel window, choose the Internet Options category to open the Internet Properties screen. Click on the “Connections” tab and select the “LAN settings” button.
Step 4
Clear any check marks found in the boxes. Click on the “OK” button twice and close the Control Panel window.
Step 5
Another option is to download tools or utilities that affect functions related to the Internet connection process. Look for utilities that can rebuild the Windows Sockets (Winsock), tweak the Receive Window (under Windows by default is set too low), and implement Web acceleration. Download and install these utilities to speed up the default Internet connection.
Step 6
Another way is to modify the Reserved Bandwidth implemented by the Microsoft Windows Operating System platform. Click on the “Start” button and choose the “Run” option.
Step 7
Type gpedit.msc in the Open box and click on the “OK: button. This will open the Group Policy window. Click on the “Computer Configuration” category and select the “Administrative Templates” option.
Step 8
Click on “Network” and choose the “QoS Packet Scheduler” category to edit the “Limit Reservable Bandwidth” option. Click on the “Enable” button and replace the default value with zero.
Step 9
Click the “Apply” button and then the “OK” button to implement the changes. This will result in faster loading of Web pages.
Step 10
Modifying some values associated with the Internet Explorer browser will also speed up the connection process. To implement this, click on the “Start” button, select Run, type in regedit in the Open box, and click on the “OK” button.
Step 11
In the Registry Editor window, select the “HKEY_CURRENT_USER” category and expand the “Software” sub-category. Click on the Microsoft folder, choose Windows, select Current Version, and finally Internet Settings.
Step 12
Modify the values associated with the MaxConnectionsPer1_0Server and MaxConnectionsPerServer keys to a higher value like 10. This will allow for more available connections for every page visited.
Step 13
Closer the Registry Editor window and launch Internet Explorer. Browse websites to see the increased speed in displaying Web pages.
Step 14
For users of the Mozilla Firefox Web browser, the Internet connection can be boosted by typing about:config in the address bar to open the configuration settings.
Read More..

Wednesday, November 18, 2009

How to remove W32.Downadup


W32.Downadup is a worm that can kill antivirus programs and block infected computers from visiting security wesbites. This worm propagates on local and network drives by taking advantage of the Microsoft Windows Server Service RPC Handling Remote Code Execution Vulnerability. W32.Downadup also create its own Service on Windows to run itself each time Windows is started.


Alias:

* Win32/Conficker.A
* Net-Worm.Win32.Kido.bt
* WORM_DOWNAD.AP
* W32/Conficker

Damage Level: High

Systems Affected: Windows
How to remove W32.Downadup

1. Download
the Downadup removal tool and save it on Desktop.

2. Double click on downloaded file, chose “Extract all files…” from the File menu, and follow the wizard’s instructions. You can use any other archiver, like WinZip. This will create a folder called bd_rem_tool.

3. Double click on the file ”bd_rem_tool_gui.exe” (or just “bd_rem_tool_gui”). Make sure that all files have been extracted from the zip archive, because all the contents are required for the removal tool to run. Follow the tool’s instructions.

4. If you have Restricted Acccess (not Admin) on Windows Vista and XP, right click the “bd_rem_tool_gui” program and choose “Run as Administrator”. Enter the computer Administrator Username and Password when prompted.

5. Reboot your computer when scanning is finished.
Read More..

Monday, November 16, 2009

Posting Articel On Your Blog Use MSWord 2007


Believe it or not?, Here is something new for you..
What you want to directly publish posts to your blog ?

Microsoft Word 2007 can be used to publish posts on your blogs. There is no plug-in or add-ons you need to install. Word 2007 allows you to connect to the internet and publish your posts. You can create and configure an account in word and start blogging. You can use it to publish your posts for Windows Live, Blogger, Typepad, Wordpress and others. After that you just need to provide the details for your images, and its done.
Just follow these steps and you are ready to start blogging from Word 2007


* Click the Office button, and click new, choose the option “Blog Post”.

* If you are opening it for the first time then it will automatically ask you for the configuration of an account, If not click on manage account, and click new.

* Choose your Blog provider and provide the login details.

* Then choose the image where you want to upload. You can choose to upload the images on your own server if your blog is a self hosted, choose “My Blog Provider” in case your blog provider gives you space to upload pics like blogger.

* When you are done with writing, you can publish the post directly or else you can also make the post to publish as draft.

You can also create multiple accounts to publish posts to separate blogs .
This is one great way by Microsoft to step into the blogosphere.
Happy Blogging..
Read More..